A different type of fiber..
Specifically, fiberglass.
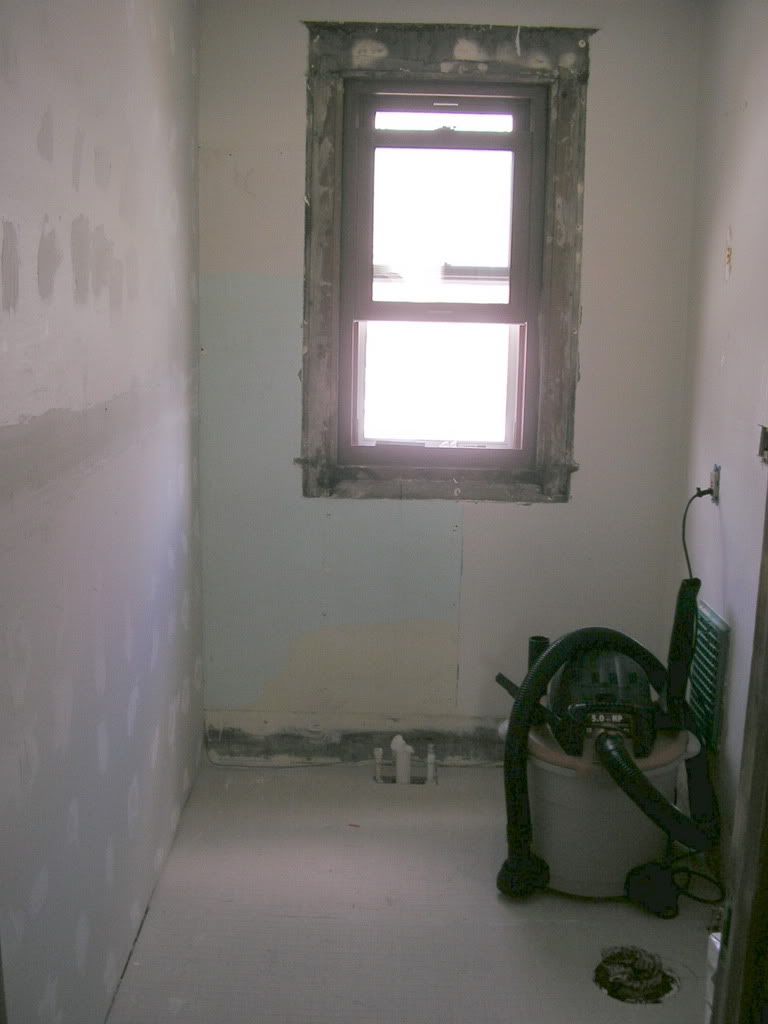
This is how our upstairs bathroom looked Wednesday (all pictures are clickable thumbnails; click them to get a bigger version):
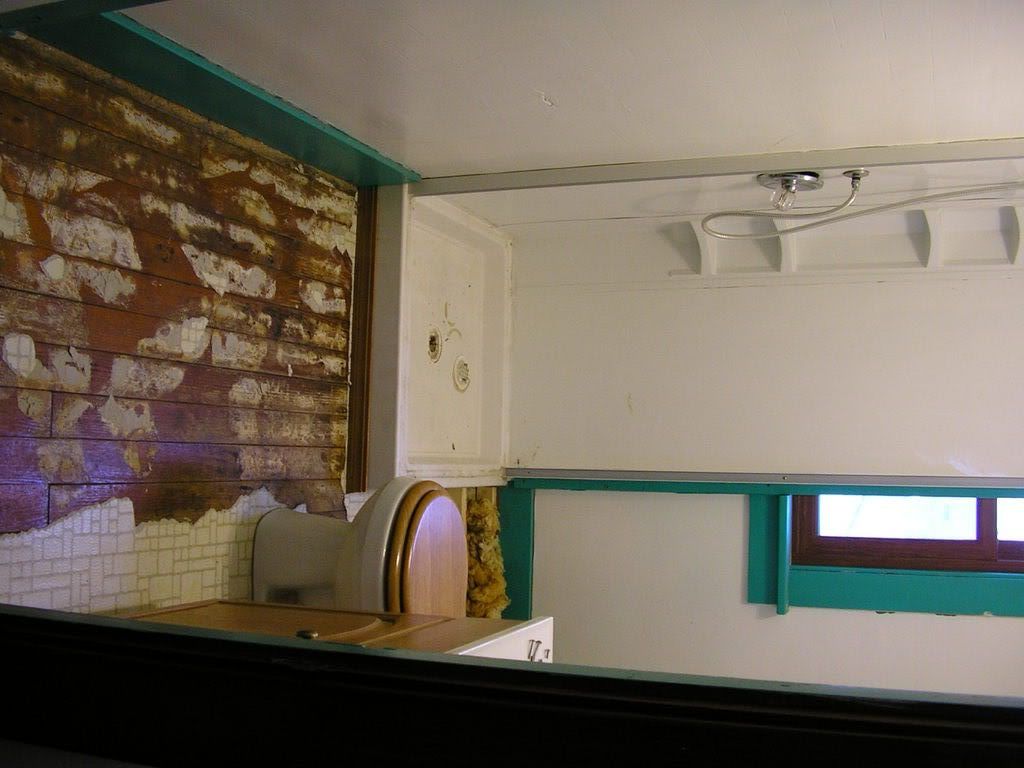
You can see that we've already started ripping up the linoleum flooring, and that we've removed the sliding glass shower doors, but otherwise, very little has changed. Yet. (Yes, we had lovely hardwood floors throughout the upstairs.. lovely hardwood floors that someone decided to cover with linoleum. Poorly, at that.) Note the absolutely atrocious paint - that's some brand of aqua green and it's the same as the color I'm trying to eradicate from my kitchen. What you can't see in the picture is that they also painted the entire door a combination of this aqua and white - an entire, old, farmhouse door with four recessed panels. The most egregious part of this bathroom, however, isn't clearly visible from the door.
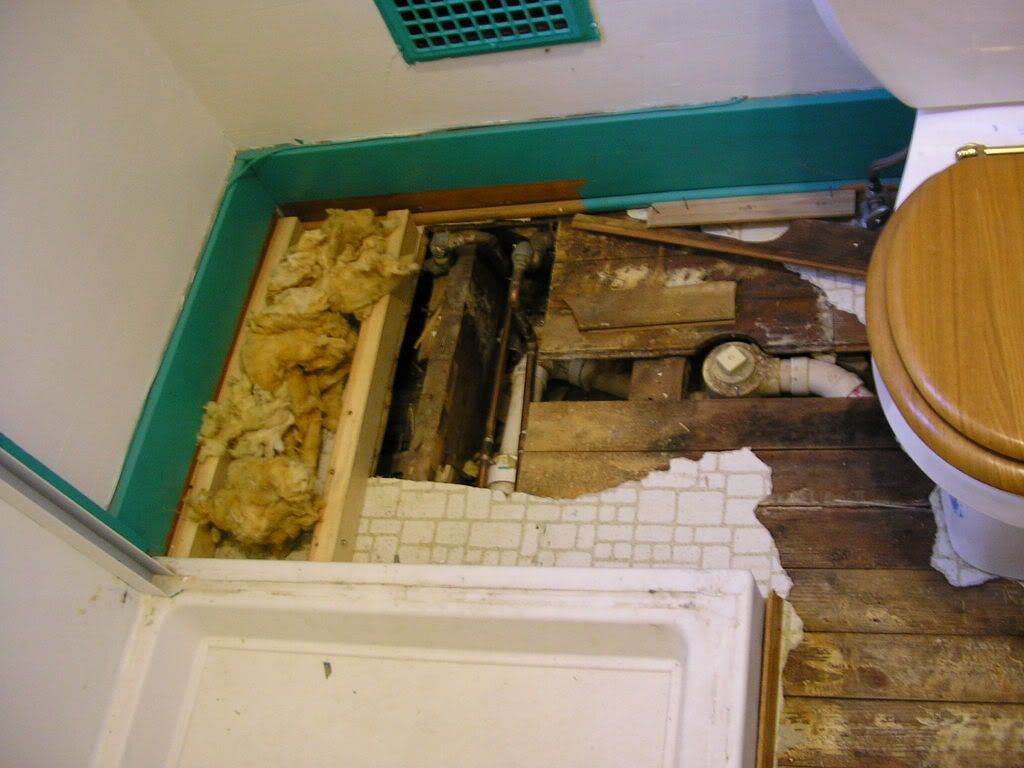
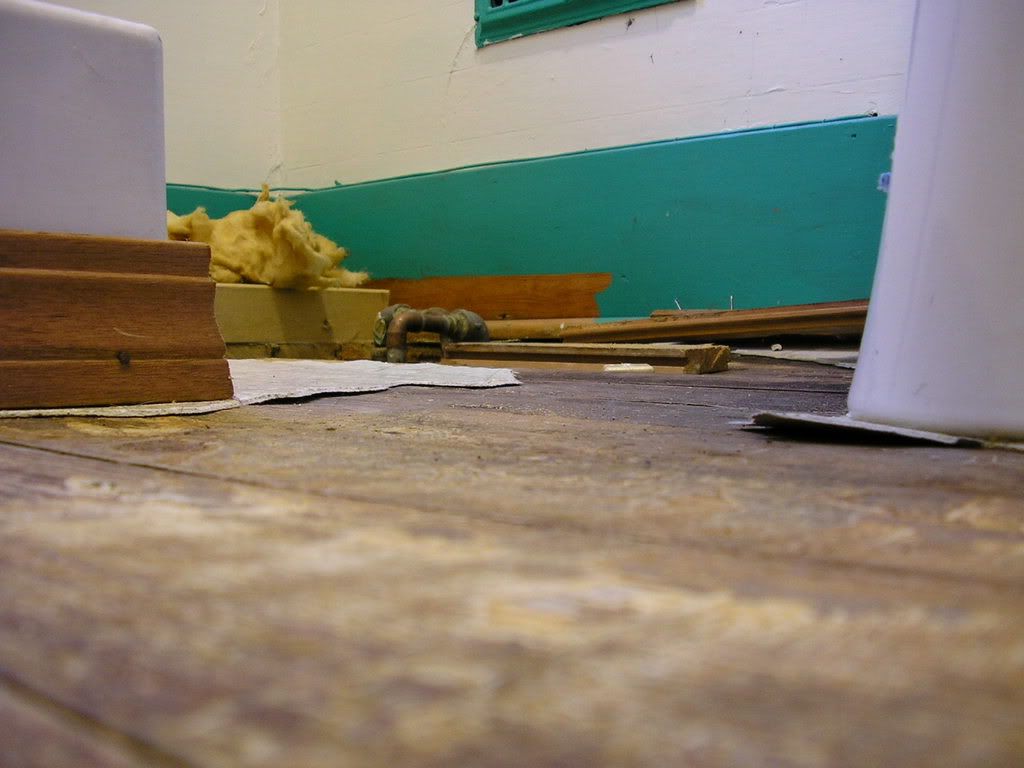
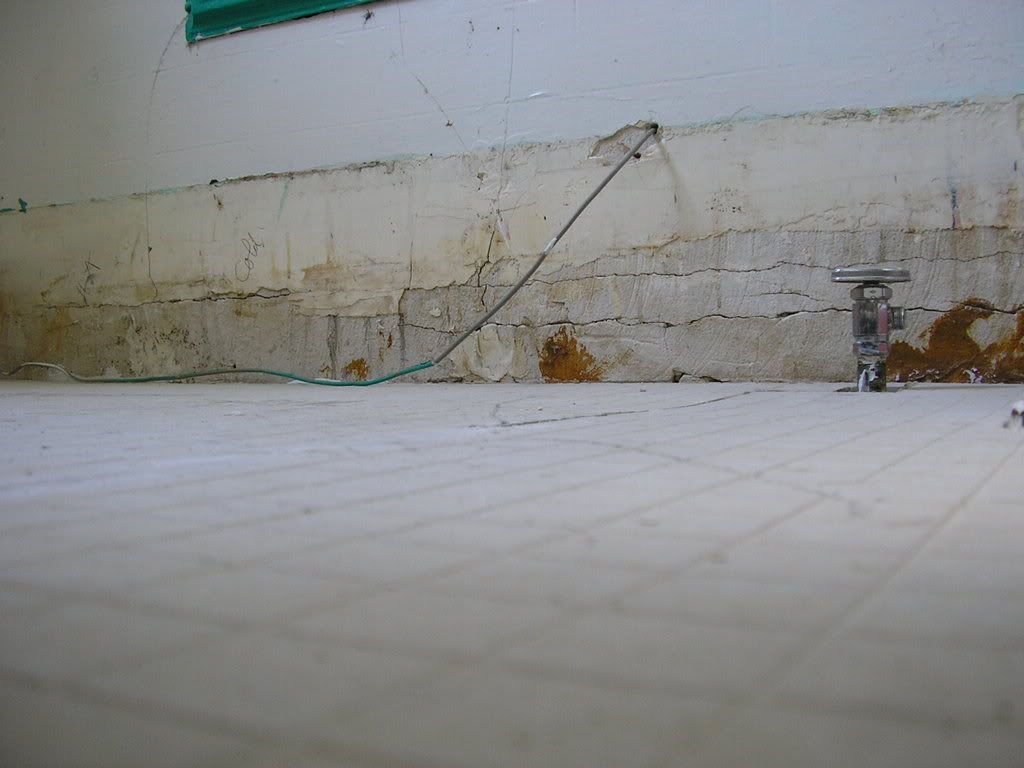
Those are two shots of the plumbing nightmare that Dumba$$ Do-It-Yourselfer who decided that a 5x8 foot bathroom needed a shower concocted. You'll notice in the second shot, which was taken with the camera resting on the floor of the bathroom, that the copper pipes come up above the level of the floor. Presumably, this was done to allow the pipe to travel over a floor joist (though we're not quite sure why that was necessary at all) rather than acquiring the tools to route the pipe through the floor joist. To cover this unsightly mess, said DDIY built a shoddy "box" out of 2x4 and plywood that created a still unsightly and unstable step up at the back of the bathroom. Also note that there's a sewer trap that's just barely visible in the second picture that also comes up through the floor boards. This trap was installed for the shower and connects to the toilet sewer drain.
We decided some time ago that there is no need for this house to have two full bathrooms (or rather, 1 and 3/4 bathrooms), especially given the terror that was the upstairs bathroom. We've speculated that this bathroom may at one time have been the only bathroom in the house and that there may have been a small-ish clawfoot tub where the shower was installed. However, the owner prior to us had an addition put on the first floor that consisted of a large full bathroom and a back entry/laundry room, so there's no longer a need for a full bathroom upstairs (and we've never used the shower, not least because the drain in the floor was set 1/2 an inch too high so it wouldn't drain properly). The first order of business, then, was to remove the damned shower:

That's my dad - who is really quite an accomplished carpenter, plumber, electrician, etc. This is at least his fourth bathroom remodel - he did the bathroom in my parent's home some twenty years ago and has more recently constructed and/or remodeled both bathrooms in my sister's house extensively. We hope this will be his last bathroom remodel, but there are no guarantees!
At any rate, you can see pretty clearly the mess they made in installing this shower. To begin with, the room simply isn't big enough, so in order to brace the back wall of the shower, they had to install a piece of 3/4 inch plywood that covers most of the window. They then proceeded to epoxy the shower surround to the plywood and the adjacent wall. We had to utterly destroy the surround to get it out, but both glass doors were salvageable.
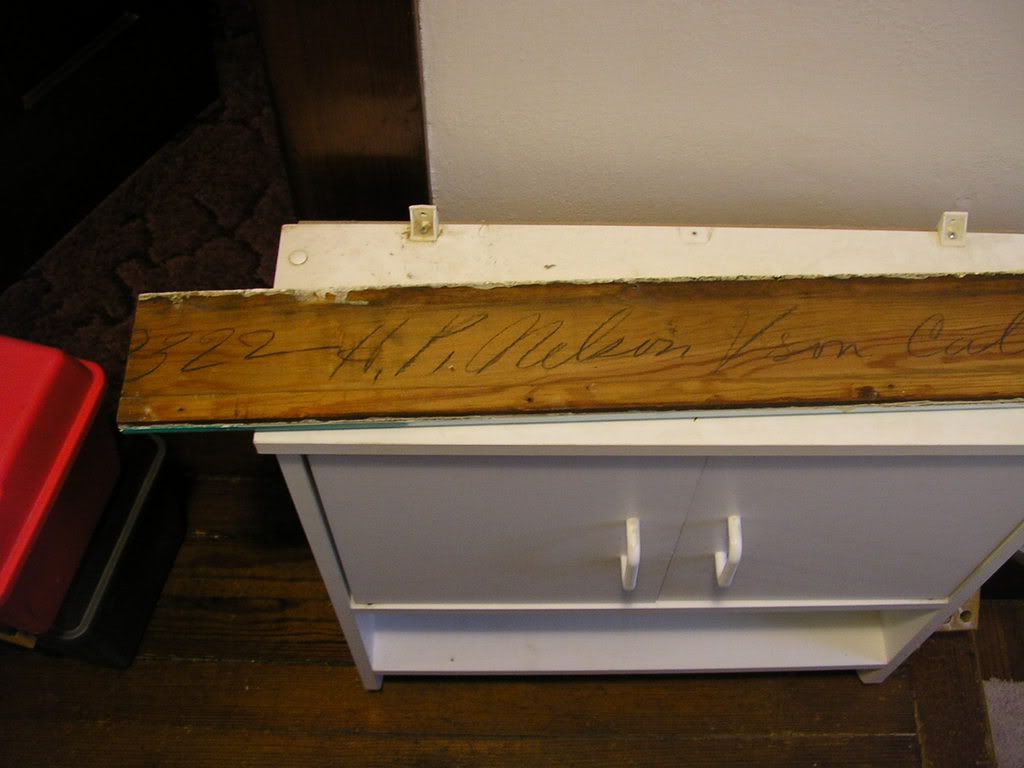
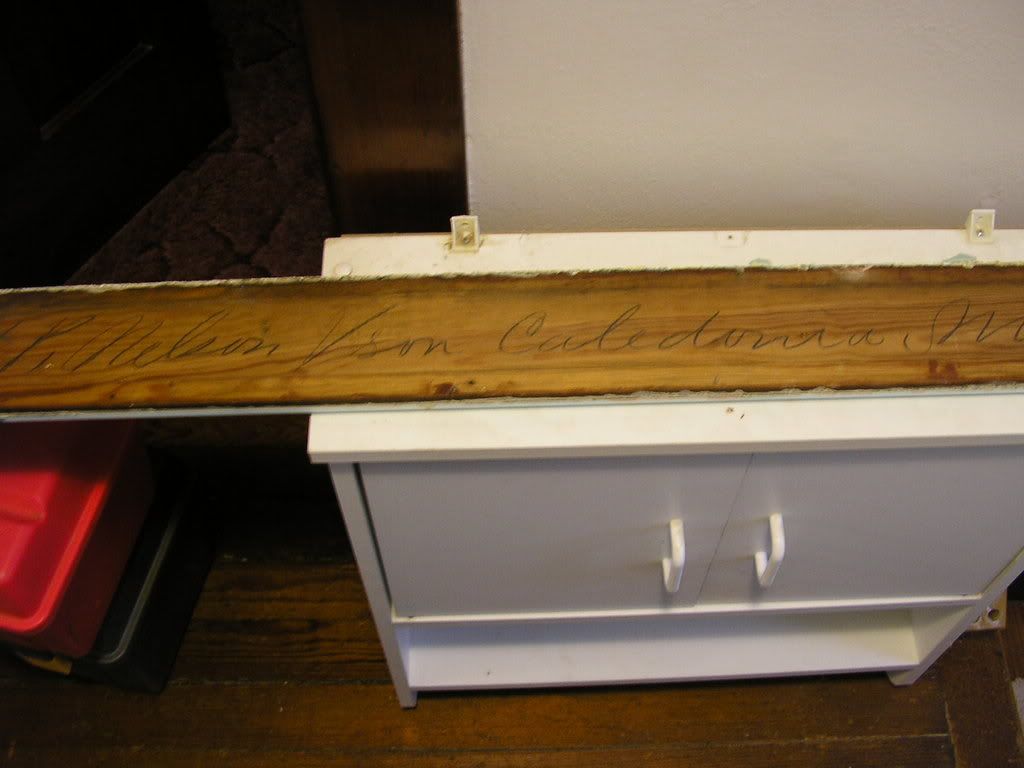
We removed all the trim in the room because the better part of it needed to be replaced anyway; they cut through the window sill to install the shower, so we need to completely reconstruct the trim around the window. We didn't think it was worth stripping the paint off the 6 inch kick board, or the door trim, so we'll be replacing it all with something likely smaller and pr'bly more modern (for better or for worse) once the rest of the room is finished. In so doing, though, we found that the lumber for the trim in this room (and likely the whole house) was supplied by H.P. Nelson & Sons, Caledonia, MN:

Up next, we wanted to move the vanity. We're almost 100% certain that the vanity has been in the front corner of the bathroom since the house was built because they worked the lathe-and-plaster around the drain and the water pipes. However, we wanted more counter space in the bathroom and without a tub or shower by the window, there's plenty of room to put in a 4 foot vanity and still leave adequate space around the heating vent. So we moved the vanity and sink over by the window. (By the by, if anyone knows someone in the SE MN/SW WI/NE IA area who wants a 30 inch wide by 22 inch deep bathroom vanity and sink, have them contact me.)
Because the shower was already plumbed (albeit poorly), we didn't have to run new water pipes up to the bathroom; we just had to fix the ones for the shower and route them properly through the floor. (We also capped the water pipes and drain for the old sink.) We opted to move the only outlet in the room from the front corner to the back corner so it would be closer to the new vanity, and to remove the built in medicine cabinet that was above the old vanity.

The plumbing and electric work took dad the better part of Thursday, Friday and Saturday. In the meantime, I stripped the paint and old varnish off the door (no pictures - it's out on the porch under a tarp with the remaining drywall at the moment), which involved no small amount of detail sanding. Sometime after dinner last night, though, we were able to lay the first concrete board for the new floor:

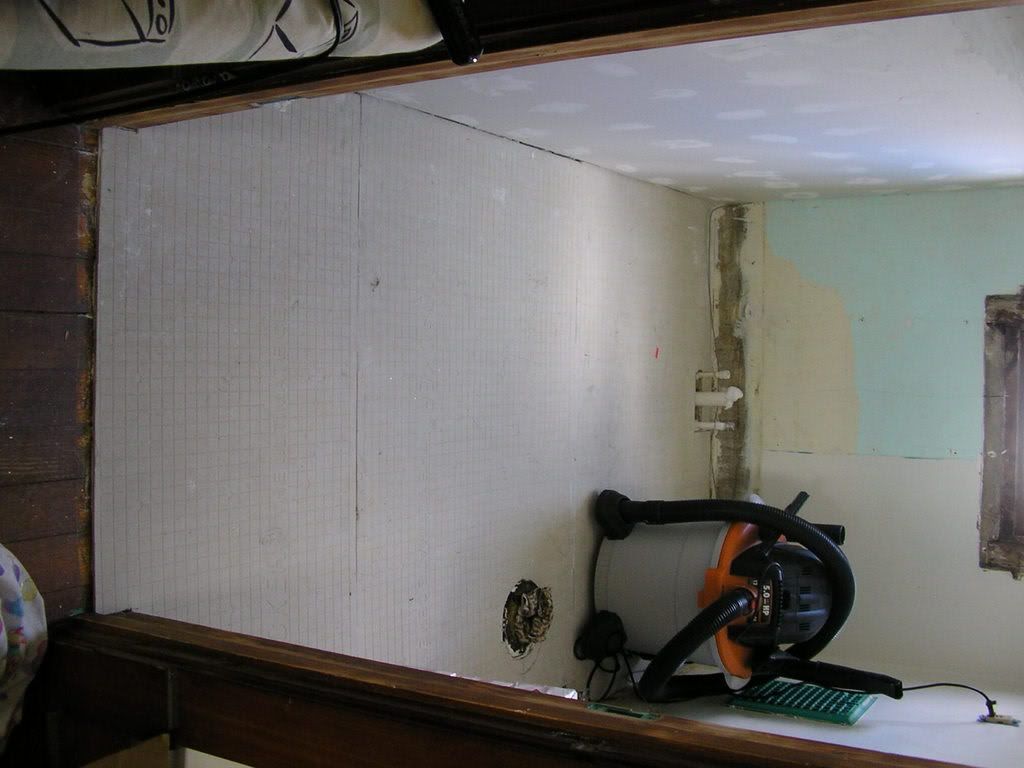
You can also just barely see the new outlet in this shot, as well as the fully unobstructed window and the mess of the wall left after we removed the shower. The wire that you see along the back wall is actually our phone line, which was glued in behind the shower and tacked to the kickboard to run through the room into the den, which is the next room over on the right.
This morning, we laid the rest of the concrete board for the floor and hung the drywall on the left hand wall:
Dad will be coming back next weekend to help us finish hanging the drywall (he has a small bit of plumbing work left, too: the old sink drain is capped, but sticks out too far from the wall, so he needs to open up the wall and remove the elbow just inside to put the cap inside the wall), after which we'll prime and paint the room (we picked up a lovely lavender paint) and then lay down ceramic floor tile (a matte grey that looks like chiseled rock) over the next few weeks. (We'll put the toilet back in after next weekend so we can use it in the interim; not that it's necessary, just nice in the middle of the night!) Dad will be back in early May, at which point we expect to finish the last bit of floor tiling (some of the tiles will need to be cut to go around the toilet and the plumbing for the new sink and we're not quite up to that job without supervision!) and install the vanity & trim.
All in all, it's been a very productive and moderately exhausting week, especially as all of this remodeling fell immediately on the heels of a work-related trip to South Carolina for three days. That said, I'm very, very pleased to have this project started and well on it's way and can't wait to get the rest of the dry wall hung so we can start the painting and tiling in earnest.
![]()


3 comments:
Question on the flooring - is the original wood no longer in good enough shape to use? Or do you just prefer the tile?
-elliesam
What a lot of work! Do you suppose your dad has rested up enough to come my house and do my bathroom :-)
Looks great!
Frameless shower doors are very economical to purchase and hence they can easily be purchased by the average people. They look very delicate and thin apparently and thus many people are afraid that they would easily break. However the fact is that they are much more strong, thick, and durable than the ordinary glass and this makes their maintenance easier.
Post a Comment