26 February 2007

A couple more inches..

.. both of snow over night and of progress on the Blue Willow. Photos of each aren't terribly different from before, though. *shrug* I made our neighborhood Good Snowmaritan some raspberry struesel muffins yesterday and delivered them to him, which he seemed a bit bemused by. *smile* He must have had to work today, or he felt that these last couple inches weren't worth the effort (which I doubt), but fortunately it was light enough and warm enough that shoveling didn't take long.

I did get some lovely Morehouse Merino lace weight in the mail today, though:


I bought it from someone who posted on the DeStash blog, all six skeins for $25. The purple is more red than it looks in the picture.. I couldn't seem to get a picture with either the red or the purple really right, though the red is pretty close in this one. I really have no idea what I'll do with it, which is somewhat unusual for me, but it seemed too good of a deal to pass up.

Oh, and I got an email from Adagio telling me my new infuser (and rooibos tea!) had been delivered, so tomorrow morning after spin class I will once again be enjoying nummy, nummy tea.

25 February 2007

Blue Willow Cardigan update

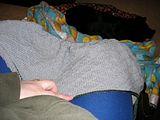
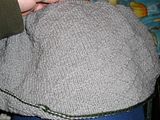
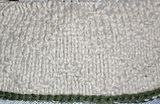
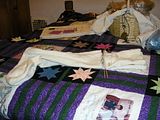
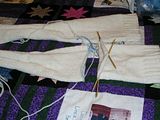
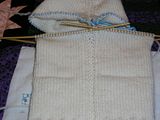
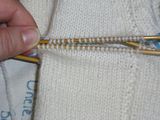
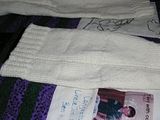
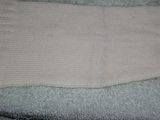
I feel like I've not made very much progress on this one, but I did finish the first of six skeins of the grey yarn this evening, so I thought I'd post a photo or two:


The photo doesn't show the full width of the piece - it's the full girth of the sweater, less about 6 inches which will be added with the edging, knit flat because it's a cardigan. I've decided to make it longer than the pattern calls for - if I left it at the length called for, I think it would feel too short. The pattern says that if you lengthen it, you need to lengthen it by 3 inches due to the length of the pattern repeats on the boder, so I have four more inches of the body to go until I divide for the front and back. At that point the bulk of the body will be finished, so things should go a little faster.

In the meantime, I may switch for a bit to tablet weaving and/or bobbin lace and/or spinning for a bit. My knitting mojo seems to be errant of late, so maybe something else will hold my attention better.

24 February 2007

Dedicated to our friendly neighborhood Good Snowmaritan

This was the scene from our house around 8:45 this morning:


Note that we had only been shoveling for about half an hour at that point - the walk from the house to the street. The main part of our sidewalk was cleared by our friendly neighborhood Good Snowmaritan who owns a riding snow blower. He apparently lives for days like today when he can drive through the neighborhood helping his neighbors (and saving our backs!) by clearing the main sidewalks. He does this every time it snows - even if it's just an inch of light fluffy stuff - but days like today I appreciate it all the more. This afternoon I'll be making some coffee cake to drop off at his house as a thank you.

I also, however, appreciate the photos I took last summer of our yard in bloom:


Of course, we're currently in the middle of a trough between two storm systems and have another 10-12 inches predicted for overnight tonight. Our local roads are pretty clear now, but apparently the highways are still a bit of a mess; goodness knows how bad things will be tomorrow if we get another foot!

20 February 2007

Knitting progress has been suspended.

I received what has become my annual shipment* of Lush supplies today. I'd already be in the bath, but I'm having a hard time deciding what to use first. *smile*

So while I'm trying to decide, I thought I'd post a quick note, mostly to Sara, to say I tried rooibos tea yesterday. It's tasty, different from what I expected, though I liked it better than black teas, so I think it will likely become a staple. And while I'm waiting for my replacement diffuser (they have them on the website for $3.. I'm apparently not the only one who's had one go missing!) from Adagio (who also has a caramel rooibos tea -MMMMmmmm!), I've discovered that my little ingenuiTEA teapot works just fine with tea in bags and is easier to "dispense" than when made in a regular tea pot. I picked up some Lipton caramel something or other in the little pyramid tea bags last week and it's been quite tasty with a bit of non-dairy creamer.

And while it's not really related to anything, I spent a lovely weekend with three of my best friends from high school last weekend. We shopped and ate and caught up and relaxed (away from the kidlets for two of them). We've been spread a bit far and this is the first time we've all seen each other in person in about four years, and that was at one of our weddings so we were a bit occupied with other affairs at the time. Now that we're all a bit more settled, though, we've decided that we should reconnect. This weekend was the first "girl's weekend"; we have another scheduled for late July. *smile*

The timing was fortuitous - I don't have very many close female friends, but have been thinking lately that I need to take the step from post-grad-student to professional, which is a somewhat foreign area for me. Not in action, but in how to look the part, particularly in how to dress the part. I've ordered some outfits from Lane Bryant on line, but needed to expand on that meager beginning. My best friends helped me decide on a couple new pairs of pants and a new shirt from Lane Bryant and, in an effort to try to "look the professional part", helped me learn about make up.

Yes, as a *mubletypeg* year old woman, I'm just now learning how to properly apply make up. My best friend from high school is a Mary Kay representative and she brought her kit down so I could find stuff that wouldn't make me feel like I was wearing shellac. I think we succeeded - instead of a more traditional foundation, I'll use a tinted moisturizer with SPF 20, which also means I won't need to use any loose powder. I'll use lip gloss instead of lipstick, with no lip liner, and a nice subdued mocha/coffee color scheme for eye make up and cheek color. Spendy, yes, but I feel like I got quality make up that fits my needs precisely, so I think it's worth it.

At some point I may take the step of actually going to a hair stylist to get a "real" hair style, but for now I think a wardrobe update and make up will suffice!

* My sister-in-law's birthday is tomorrow and her brother (my husband) usually opts to get her Lush for her birthday. Since I'm ordering anyway, I usually take the opportunity to stock up for me, too. And since Lush tends to be on the pricey side of things, I don't order from them for me too often!

19 February 2007

Peek a boo! I see you!


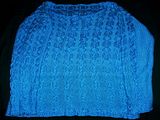
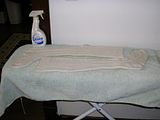
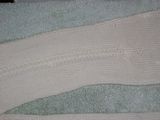
All done! (Sorry the photos suck; the modeled ones even moreso.)


The first picture is blurry, but more color accurate; the second is not blurry, but completely washed out.

*sigh*

I'm a little worried that the arms will be a bit too small - I have fat arms, though, so maybe it won't be quite so tight on the recipient. I need to remember to include a note with care instructions, though. It's cotton/modal and I don't want her to wash and dry it and have it be too small. In any case, I'm giving in one more blocking round now that the seams are in, so it pr'bly won't get sent until later this week.

18 February 2007

Shopping for a good cause, anyone?

Want to support an agency that works year round with women & children victims and survivors of domestic violence and sexual assault and get some great deals on clothing, housewares, and more at the same time? If so, you can purchase a Community Day coupon booklet - which has a $10 coupon and eight %-off coupons all good on March 3 (and only March 3) *on top of to special one-day sale prices* at any non-New Jersey location of the Bon-Ton, Bergners, Boston Store, Carson Pirie Scott, Elder-Beerman, Herberger's, or Younkers.

The booklets are $5 each (so you get your money back and then some when you use the coupons) and the money from the sale goes directly to support the programs and services provided by Houston County Women's Resources (disclaimer: I'm on the Board of HCWR). If you want a booklet, let me know!

Oh, and there are also a couple special one-day sales that day - like $30 off their entire stock of Men's & Women's Clarks shoes, or Leisure Lakeside luggage for $19.97 per piece (originally $80-$120 per piece). You can't use the %-off coupons on the bonus buys, but they're still pretty good deals.

They do Community Days twice a year and last spring we got some very good deals (like a $100 jacket for Jack for $5). It's getting close to spring and time to refresh your wardrobe and Community Day means you save money and donate to a great cause at the same time.

15 February 2007

On a more positive note..

All the pieces for Peek a boo are blocking; they should be dry tomorrow sometime and I'll seam it this weekend hopefully, leaving early next week to do the last finishing bits and about a week to mail it. Yea! I'll post pictures when it's more exciting.

In the meantime, I've picked up the Blue Willow Cardigan and even though the rows seem impossibly long, the larger gauge means that inches get added much faster than just about anything I've knit lately. Progress pics as of last night:


The patterning is a diamond slip-stitch with yarn to the right side sort of thing and in all honesty, I'm not quite sure of why they did the slip-stitch patterning instead of a purl stitch which I think would result in a fairly similar design and, in my opinion, make it easier to see the pattern from either side of the knitting. But I'll knit it as written since I have about three or so inches of it done already.

I haven't really read through the entire instruction sheet, but my understanding is that the main body is knit first and then the fair isle border is added. Not sure yet if it's picked up and knit on, or knit separately and then sewn on, but I'm sure I'll find out.

The yarn looks like it should be scratchy, but it's really not. I expect this sweater to be quite warm and soft, though maybe not next-to-the-skin soft, which wouldn't really ever happen anyway as I usually wear cardigans over another shirt.

Not my day.

Bah.

It's the sort of day where I wondered while drying my hair briefly after my shower after spin class if I'd remembered to rinse out the conditioner. I think I did.. but can't quite remember and my hair felt unusually slick for lack of a better word, so I might not have.

I arrived in my office to discover that our building is still without water. Something happened - not sure what - Tuesday that caused them to turn off all water service to the building. They stripped a router bit trying to clear out the main sewer pipe, which would seem to indicate that they hit something concrete or metal. Not a good sign. Rather than do something logical like close the building, though, we're all just expected to hike to either the student center or the technology building next door to use the restroom. Never mind that there's no access to water in the building so if you want a drink you'd better bring it in yourself. Need to rinse a coffee or tea mug? Sorry; out of luck. (Fortunately, I do usually bring some water in with me from home and have been doing so this week; it's still annoying, though.)

Then, after overfilling my teacup twice, I realized that the reason the tea leaves were getting stuck in the drain and keeping it open was because the little screen that was in my ingenuiTEA teapot yesterday was no longer there. I can only assume that it fell out yesterday when I dumped the leaves from my last cup of tea. I had checked it earlier when I first got it and it seemed like the screen was in there more or less permanently, so I didn't think to check for it after dumping out the leaves. I guess I was wrong. *sigh* (Yes, I've emailed Adagio already asking if I can order a replacement for it; I've grown quite attached to my little ingenuiTEA in the last few days..)

Edited to add: And we just had a last minute staff meeting where our Provost (who I report to directly) announced that she has accepted a position at another institution. Yeah. Not a great day.

13 February 2007

Teapots, part three!

It came!


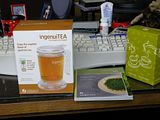
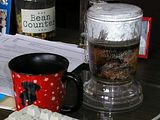
It's bigger than I expected (the pictures below help with scale), which is neat. And holy "samples" man! The little box on the right contains four not-so-sample-sized tins of flavored tea - oriental spice, vanilla, mango, and strawberry. There's pr'bly enough for 10-12 cups of each flavor in the tins! Having been on a chai kick lately, I decided to try the oriental spice first.


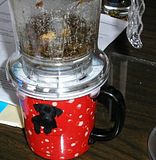
It took me a few minutes to figure out how it works because I thought the little video on the website showed a lever that you slide to make it pour, but you just set it on the cup to make it pour (there's a little piece that slips down to block the water from pouring, but the edge of the cup pushes it up out of the way).


And I was almost stymied in my quest to try it Right. Now. because the sewer pipe for my building has apparently decided to back up which means not only do we all have to trek out to another building to go to the bathroom, but also that we aren't allowed to run any water or pour anything down the drain. Fortunately, I bring in water every day from home (the water here has a chemical/cholorine taste), so I just needed to decide it would be okay if I drank tea out of my unwashed cup from yesterday.

MMmmm.. I need to learn more about how much tea is enough - the oriental spice was tasty, but not quite strong enough.. or something. Maybe it just needed a little milk. I guess I'll have to make another cup and try that out. *grin*

In other news, do you know about the DeStash blog?! Evil thing. I've added it to my blogroll just in case something irresistable comes up (because, you know, between several pairs of socks, at least three sweaters for myself, and at least one more bucket hat, I don't have enough projects).

Speaking of projects, though, I finished the second sleeve for Peek a boo in the car this morning (all but the last cast off because I think this one ended up a row shorter than the other and I want them to match; the other sleeve is at home so I'll have to check tonight). I'll try to get the pieces blocked tonight, but I have a planning meeting with the Board officers for HCWR from 6 until about 8, so I may be wiped out by the time I get home.

So that means I need to figure out a commuting project to start tomorrow. I need to make another bucket hat, but since I'm stubborn and didn't want to buy a 16 inch circular when I could make five dpns work just as well, it's not really a good project to toss in a bag until it gets past the brim part. I have yarn for Celtic Icon (but not the yarn used in this picture; I have Knit One Crochet Too Angora Soft in Light Moss & Moss from Webs) from Inspired Cable Knits, a sweater kit from Blackberry Ridge, and the Easy Lace Jacket kit (which I was a bit surprised to find included Cascade 220 for the yarn) from White Lies Designs, all for me. I feel sort of obligated to do the Blackberry Ridge kit first, both since it's the oldest of them but also because it's going to quickly be too warm to wear it comfortably. But the Lace Jacket is whispering things like "but I'll be quicker", so I'm a little torn.

12 February 2007

Teapots, part two.

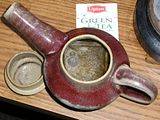
As promised, here's a picture of my other teapot:


This one is a bit more conventional - but rather uneven. The knob on the top isn't properly centered, the ridge is a little crooked. It's also somewhat considerably smaller:


(The tea bag steeping is actual a variety of Chai, not the Lipton Green Tea, but I left in the Lipton package to show scale a little better.)

It is just about the right size for a single cup, which works well at work because I can heat water in a mug and in the teapot at the same time, steep a tea bag in both and have one cup ready made in my mug and a second already steeped when I'm finished with the first. It's also a useful vessel for heating water for other uses - like instant oatmeal or those noodle cup things - because it's easier to pour out of than a coffee mug.

Not as exciting as the other, but still suits its purpose rather well. I'm hoping that by tomorrow I'll be able to round out my little teapots series with my latest acquisition (thanks again to Sara for pointing this one out)!

I made more progress on the Peek a boo sleeve last night and this morning in the car and I've only got a couple inches left to go.

Today is just flying by, though, pr'bly because I had a dentist appointment this morning to get the permanent crown I lost a couple weeks ago replaced permanently. Despite past dental trauma (yes, even for somthing as "easy" as placing a permanent crown), this morning's appointment was a cinch, so I'm in a much better mood than I expected I would be!

11 February 2007

Teapots, part one

I've had a cold that seems determined to stay squarely in my throat for the past couple of weeks. While this is all sorts of annoying, especially the first week when it made my throat so sore I could hardly swallow (yes, I was cultured, no it wasn't strep), it has forced me to reacquaint myself with tea.

I am generally a coffee drinker, but I can't drink coffee - usually not even decaf - after noon or I don't sleep well. With this cold, I needed something hot to drink in the afternoons that wasn't cocoa, which is usually far too sweet. I am what could only be described as an occassional tea drinker, but I do appreciate good teas. What's more, I'm also an occassional potter and as such, have made a couple of teapots on my time, some as gifts, but two that I've kept.

This is the larger of the two and one of the pieces I'm proudest of.
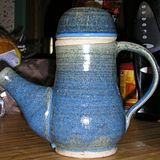


A couple of general comments on teapot construction to start with. First, teapots are generally heavy and somewhat thicker than other pieces. This is so that they hold in the heat a little longer. A tea cozy will also help with this, but I've never been motivated to make one.

Second, they're typically thrown on a wheel in three pieces - the main body, the spout, and the lid - with a pulled handle attached at the leatherhard stage. Putting together the pieces can be tricky, so usually when throwing a teapot, it's recommended that you throw at least one main body and matching lid, but two or three potential spouts. When you put the teapot together, you identify where you want to attach the spout to the main body and then cut the appropriate slant out of the spout so that it matches the point of the body where it needs to attach. This is not necessarily as easy as it sounds, which is why you usually throw more than one spout. When you have the spout ready, you outline it on the main body and then carve holes out of the main body where the inside of the spout will be so the tea will pour through. You can just carve out the whole spout area, but I usually carve out smaller drain holes so that I can leave the tea bag in the pot and not worry about it getting stuck in the spout.

Third, it's important to remember physics. Because the spout and the body of the teapot are essentially one vessel, the water/tea level will be equal in both parts when you fill it. In other words, you can only fill the teapot to a level equal or lower than the bottom of the opening of the spout. You'll notice in the above teapot that this means that the actual capacity of the teapot does not include the tall neck. Even with this limitation, this teapot holds at least two decent cups of tea.

However, the reason this particular teapot is one of my favorite pieces is because I was somewhat clever in designing it. The lid is also a tea cup, you see.
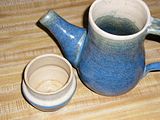


So, I can make tea in the teapot, leaving the lid on while it steeps and then just flip the lid over and have my tea cup ready to go. The steam from the steeping tea warms the cup so the tea in the cup stays warmer a little longer. As an added bonus, the lid fits over the top of the teapot "upside down" as well - which allows the tea in the pot to stay warmer longer, and keeps the tea cup warm at the same time.
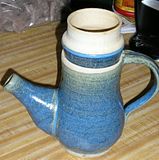


So, while this is one of my favorite pieces, it hasn't been used much until this past week when I found myself craving a warm beverage I could drink at any time. The larger capacity makes it ideal for home when I'm unlikely to be too distracted by other things to finish the pot while it's still warm.

My other teapot has migrated to work in the last week, and I'll try to remember to take pictures of it and talk about it tomorrow. It's not nearly as clever, but it's better suited for use in the office.

And lest you think I've been a complete slacker since finishing the stockings last week, here's a picture of the Peek a boo sleeves in process:
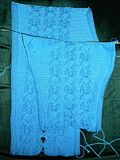


The first sleeve is finished and the second is a little more than half complete. Because the sides of both sleeves are all reverse stockinette, they roll in pretty terribly; the finished sleeve is much wider than it appears in this picture. As this is a gift, it has a deadline of later this month, which I don't think I'll have trouble meeting. I'll need to block each of the pieces separately before seaming, which will take a couple of days, but if I get it seamed next weekend that's still plenty of time to get it off to the recipient.

Then I need to decide what to start next..!

05 February 2007

.. and what was left was Hope.

The reasonable man adapts himself to the world; the unreasonable man persists in trying to adapt the world to himself. Therefore all progress depends on the unreasonable man.
- George Bernard Shaw
From an article in today's Chronicle of Higher Education (link for subscribers only - Sorry!) (Here's a link to another, longer, article on Inside Higher Ed.)
Michigan's public universities and other state-government agencies cannot provide health-care or other benefits to same-sex partners of their employees, the Michigan Court of Appeals has ruled.

In an opinion released on Thursday, the court said that such benefits violate an amendment to Michigan's Constitution that bans gay marriage. A three-judge panel interpreted language in that amendment as barring public employers from recognizing same-sex unions in any way, including offering benefits. Institutions affected by the ruling include the University of Michigan, and Michigan State, Central Michigan, Eastern Michigan, Northern Michigan, and Wayne State Universities.
I have to believe that the upset and turmoil currently spreading across the country will eventually (soon?) lead to progress toward equality of rights for same sex couples and their families. For years, these issues have hidden away out of the headlines, but now the whole country is watching dueling headlines from states across the nation.
Restlessness and discontent are the first necessities of progress.
- Thomas Jefferson
People are making waves, and waves upset the status quo. The only way to reach the light at the end of the tunnel is to keep going through the tunnel.
If you're going through hell, keep going.
- Winston Churchill

04 February 2007

Get it right the first time, that's the main thing!

As mentioned, I missed a pattern modification to add three inches of length to the Stockings with Clocks before the calf decreases and didn't figure it out until after the first stocking was completed. Rather than rip back something on the order of 18 inches of completed knitting, I decided to insert the extra three inches into the leg instead. I figured I had a decent enough understanding of the structure of knitting that snipping a stitch, putting stitches back on needles, and then grafting it all together again wouldn't be beyond my skills.

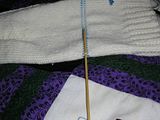
1) The first step was to work in "life lines" so that as I began unraveling the line of stitches that would be removed, I wouldn't have to worry about dropping any stitches. I chose a row two rows above the first calf decrease for the lower life line, and then left one row to unravel and worked a second life line the row above that. I used a smooth cotton yarn in a contrasting color and knotted the ends of each loop together so they wouldn't get accidentally pulled out.

I didn't try to figure out getting the stitches on the life line without twisting them, but instead picked one "leg" of each stitch and ran the life line through the same leg for all stitches in the round. The hardest part was not jumping up or down a row and I often had to pull the life line back out a few stitches to adjust accordingly.


2) The moment of truth was in snipping the yarn to begin unraveling the sacrificial row. I selected a stitch at the center of the front of the stocking, which meant I'd have to unravel it half a round in each direction to get the two pieces separated and ready for the next step. To be sure that I only cut the piece of yarn I wanted, I pulled the loop of the stitch out slightly with an extra needle.


3) Once the stitch was snipped, I used the extra needle to unravel the sacrificial row. Unlike when you rip stitches back, you can't just grab the yarn and unravel it because there are still stitches holding the yarn on both sides, so each stitch has to be pulled out separately; it turned out that snipping a stitch half way through the round meant that I didn't end up having to pull a whole round of knitting's worth of yarn through the last few stitches. As the stitches are unraveled, the life lines catch and hold the stitches on the two resulting pieces and prevent them from unraveling further.


4) Once the unraveling is finished, you'll have two separate pieces, each with live stitches held by live lines, and each with a tail of yarn connecting to those live stitches.


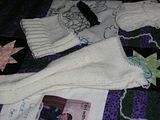
5) These stockings were knit from the top down, so in order to make sure that the stitches all line up without jogging, I wanted to add the extra length to the cuff piece. Using the life line as a guide, I placed the live cuff-side stitches back on the same needles I used to knit the stockings and knit an extra three inches, maintaining the seam stitch patterning through every round. Because the seam pattern is two rows and I'd be adding a row in when I grafted the two pieces back together, I ended on the same pattern row as the next piece begins with. To be sure that the two stockings would end up the same length, I laid the pieces of the first stocking over the completed second stocking.


6) The trickiest part with the patterned seam stitches was lining them up so that when I grafted everything together the seam wouldn't jog. The first time I did this, I was off a stitch and had to pull out the entire row of grafted stitches and re-do them! Learn from my mistake and pay attention as you start grafting to make sure the stitches on the two pieces will line up.


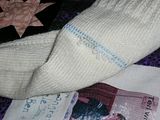
(You'll also notice in the second picture above the "indented" row - that's where the original stitches were "picked up" to start the added section; washing and blocking will make that go away.)

7) When you're ready to start grafting, you'll need to put the stitches from the second piece on to a needle and make sure they're not twisted. You can leave the rest of the stitches on the life line yarn until you need them.


8) Using instructions from any of a variety of places - Interweave Knits usually has grafting or kitchener stitch instructions in the back, as will most sock pattern books; I used the instructions from The Knitter's Book of Finishing Techniques by Nancie Wiseman - graft the two rows of live stitches together; when you need to work a purl stitch, you'll want to work the grafting "backwards" from the instructions. As you work, gently tug the working yarn after every stitch to avoid leaving the stitches too loose; you can monitor this as you work to be sure you're not grafting too tightly or too loosely. When you're finished grafting, work in all the ends securely.


9) Washing and blocking the finished piece after you're finished grafting will help remove any unevenness left from picking up stitches and grafting. As I mentioned, the first time I grafted the two pieces together, I was off a stitch and had to pull out the row of grafting. When I re-worked the row, I must have picked up some dust on the yarn that darkened the row slightly. The stockings are mostly dry now and the darkened part is still noticeable, so I'll have to wash them again using some wool wash to try to get it out.

03 February 2007

Stockings with Clocks & SP9

The stockings with clocks, from Nancy Bush's Folk Socks, with a pattern modification as requested by the largesse project organizer to add three inches to the height of the leg before the calf decreases, are finished and blocking:


You can see the pattern a bit better now that they've been soaked a bit, but it's still hard to get it to show up very much in a picture. Also, if you look closely you can see the graft line on the front stocking - I had to rip out the graft once because the seam stitches weren't lined up properly and in so doing, must have picked up a bit of dust that got worked in with the second graft line, which is also slightly tighter than the rest of the stocking. I expect with a little wear, it will become less noticeable.

I took a series of photos of the process I used to add in the extra three inches in the first stocking (I was reminded of the pattern modification after the first stocking was already complete and decided adding in the three inches would be faster than reknitting almost the entire stocking - which it was) and will likely post a sort of "tutorial" type thing on it in a day or two.

Oh, and I've revealed myself to my Secret Pal from SP9! Everyone stop in and say hi to Barb! She knits and crochets, has just learned to knit socks, and can't refuse her two gorgeous little girls, even when she's making something that she really wants for herself. *smile*